
Knocking Down Walls - Removing the Closet in the ‘Drop Room’
One of the biggest changes we made to transform the 'drop room' was removing the closet. Positioned right at the entrance from the garage, it made the space feel cramped—especially when all four of us were coming and going, tripping over shoes and each other.
I tackled this project on a whim while my husband, Chris, was away on business—surprise! When I sent him a picture of the half-demolished closet, he responded, 'nice babe'. At this point, nothing I do around the house surprises him anymore! ha.

The closet. The garage door to the left and the kitchen to the right.
Plan & Prep
I’ll admit, planning and preparation aren’t my strongest suits! But before removing any wall, there are crucial steps to ensure the process is safe and smooth:
Assessing the Wall – Determine whether the wall is load-bearing and consult a professional if needed. Luckily, this wall was purely cosmetic, simply enclosing the closet space.
Checking for Electrical Wiring – Electrical wiring can be hidden in walls, so it’s essential to check for outlets or switches. If wiring is present, turn off the power before proceeding. Thankfully, this wall had no electrical components.
Gathering the Right Tools – Essential demolition tools include a utility knife, sledgehammer, pry bar, reciprocating saw, safety gear (goggles, gloves, and a dust mask), and plenty of trash bags.
Preparing for Debris – There will be A LOT of it! If I could do it again, I’d lay down plastic sheeting and properly seal off the space—months later, I’m still finding dust.
The Demo!
This was my first time removing a wall, and while I didn’t do everything the "right" way, I certainly had fun learning - and smashing!
Since we had already removed the closet door when we moved in, I started by clearing the space, taking down the closet shelving, and removing the door trim and baseboards. This is when I should have used my utility knife to cut a test hole in the drywall and check for hidden wiring. But instead, I took the hammer straight to it.
It also would have been smarter to remove the drywall in sections by scoring it with a utility knife. But where’s the fun in that? Instead, I went all in—making a massive mess and releasing some pent-up aggression in the process. I did at least use the utility knife to score along the edges where the drywall met the ceiling and adjoining walls, so I got something right!
Once the drywall was gone and the debris was (mostly) cleaned up—including a necessary trip to Home Depot for a better broom—I moved on to dismantling the framing. With a reciprocating saw and pry bar in hand, I took apart the wooden studs one by one. Watching the space open up with each removed piece was incredibly satisfying.
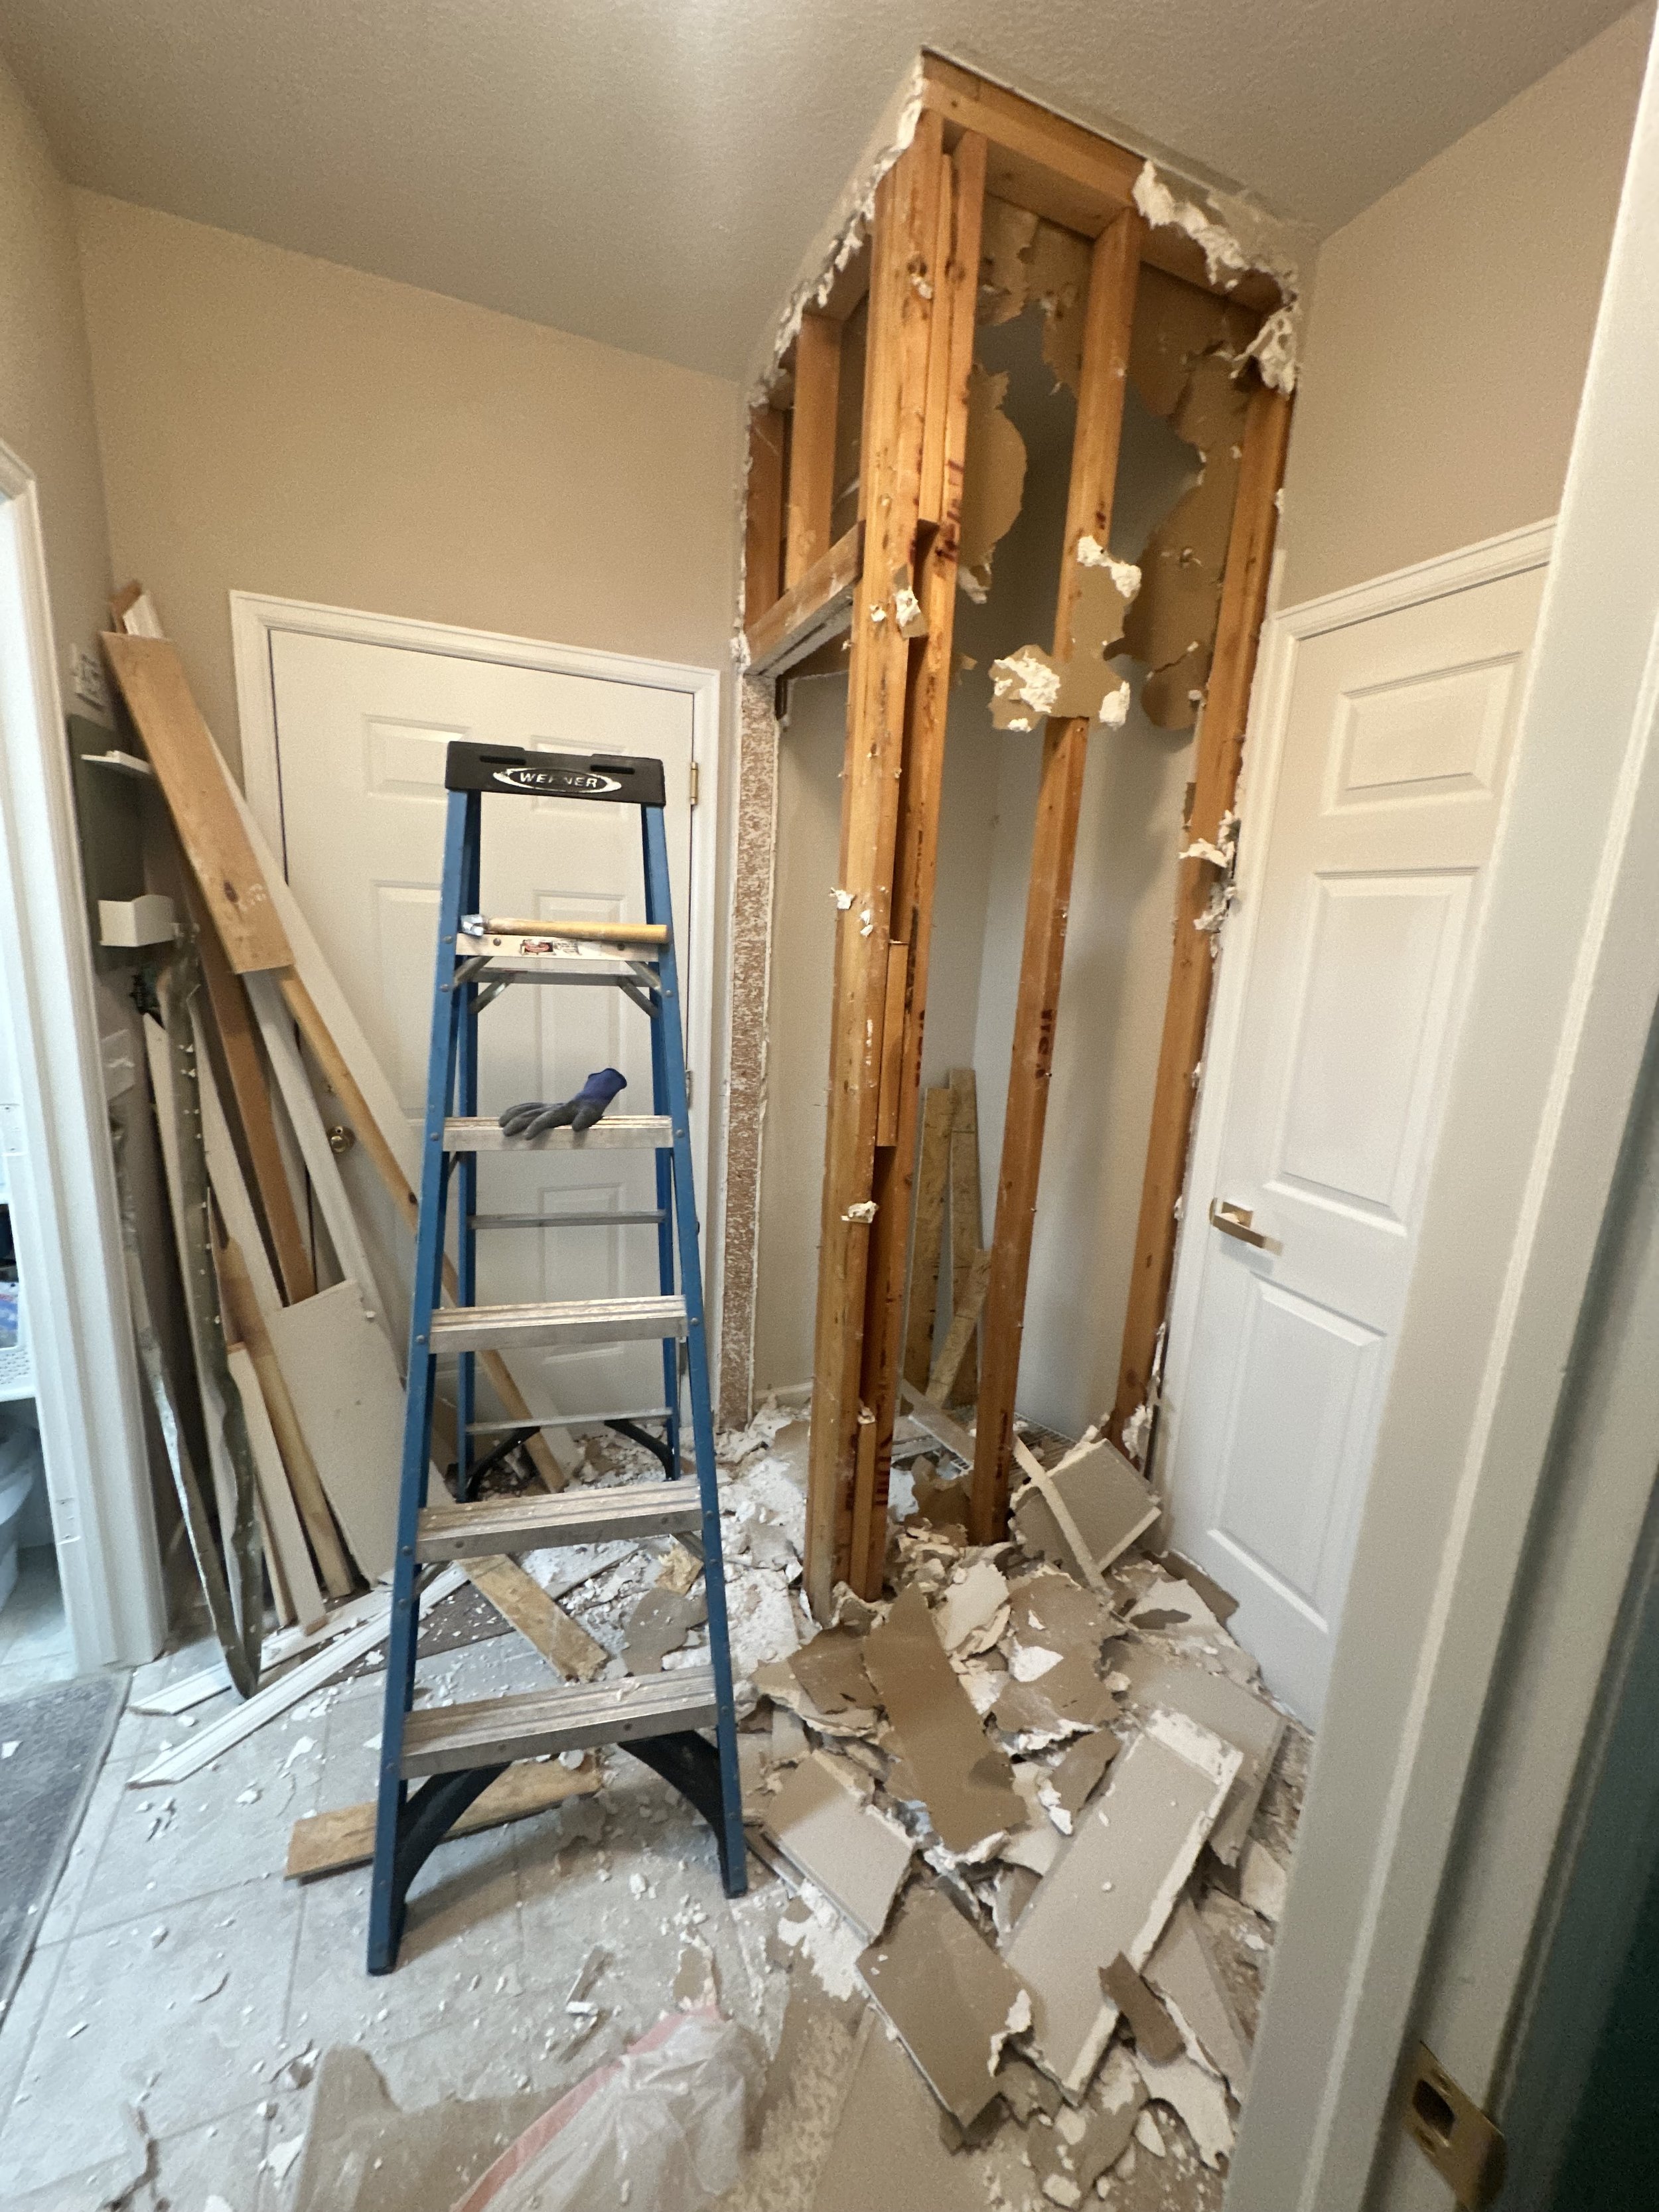
The photo I sent Chris. This was such a mess.
The Big Reveal
With the closet completely gone, I couldn’t wait for Chris to get home and see the difference. The extra square footage immediately made the room feel bigger and more functional. Of course, the removal also left us with plenty of follow-up tasks: patching the walls and ceiling, fixing the tile flooring where the studs had been, and repositioning the ceiling light. Welcome home Chris! God Bless him.
Removing this closet was a game-changer for our utility space, and I can’t wait to share the next phase of the transformation with you. Stay tuned for more updates as we continue making this space both beautiful and practical!

Okay a left a few boards for Chris to help with, but darn it if I didn’t deserve that coffee!