
Transforming Our Built-In Bookshelves with Arched Charm
So... funny story. Once again, while my dear husband Chris was away on a business trip, I found myself sipping coffee in what used to be our kitchen—completely gutted just the week before for our renovation. With the kitchen renovation being out of my control, and a little extra caffeine coursing through my veins, I decided it was the perfect moment to start a new project: arching the built-in bookshelves in our living room.

THE BEFORE
This vision had been dancing in my mind since the first day we toured the house. The built-ins frame the fireplace—two on the right, one on the left—with a beautiful arched doorway just beyond them. From the start, it felt like they were meant to echo that same curve. Plus, the original construction left a lot to be desired. The framing was clunky and awkward, and I knew from the beginning it was something I’d eventually want to change.


THE VISION
Arches are all the rage right now, and there is no lack of inspiration on the socials, but this home, built in the early 90's already had multiple arched doorways throughout. So I knew I had to match the style of the doorways that were already there.


To make everything cohesive, I also wanted the new shelves to match the height of the arched door. This made the measurements very tricky, as of course with everything in this house, each shelve was a different width, and the arch shape is not a perfect half circle. I wish I could say I did some really amazing math here to figure all of this out. But I actually resorted to Adobe Illustrator to find the radius of each individual arch.

Using Adobe Illustrator, I could then adjust my measurements for each built in down to 1/16 of an inch, and get my radius.
THE PROCESS
First, I demoed the original shelves. I was thrilled to discover that there was drywall behind them, which meant I could reclaim about three inches of depth on each side. That instantly gave the built-ins a more open feel and extra breathing room.

After Removing the Shelving
The dark grey in the back is how much space I got back!
Next, I used a multitool to carefully cut out the drywall on the tops of the shelves. My initial plan was to simply cut the arch shapes directly into the drywall and call it a day. But of course—plot twist—there was a thick horizontal beam running right across the tops of all three shelves.


Luckily, a crew of contractors working on our kitchen renovation happened to be in the house. After some careful inspection (and a bit of head scratching), we determined that the beams weren’t structural—just framing elements from the original shelf build. What a relief!
With the green light, I removed additional drywall to fully expose the beams and got to work relocating them. I rebuilt the framing a few inches higher, making sure to account for the full height of the arches, plus an extra two inches to provide solid support above their highest point. That shift made such a difference—it instantly elevated the whole look and made the room feel taller and more custom.

Can you see it starting to take form?!
To build the arches themselves, I referenced the measurements I had worked out in Adobe Illustrator. Using the old-school trick of a screw, string, and pencil, I drew a smooth half-circle onto plywood. Using a jigsaw and a circular saw, I cut each arch to match the width and height of its shelf opening. Every shelf needed two matching plywood arches—one for the front and one for the back—to create the curved shape.

To support the arch and connect it to the shelf frame, I used 2x4s cut to the depth of each shelf. These served as “ribs,” anchoring the plywood curves to the existing shelf framing and giving me a structure to attach drywall or backer board.


Once the arches were fully framed and secured, I turned my attention to finishing. While I attempted some of the drywall patching myself, I was more than happy to pass the rest off to the pros. Our drywall crew (already on-site for the kitchen) did an amazing job floating, mudding, and matching the wall texture. Honestly—worth every penny. After a fresh coat of paint, it made the arches look like they had always been there!

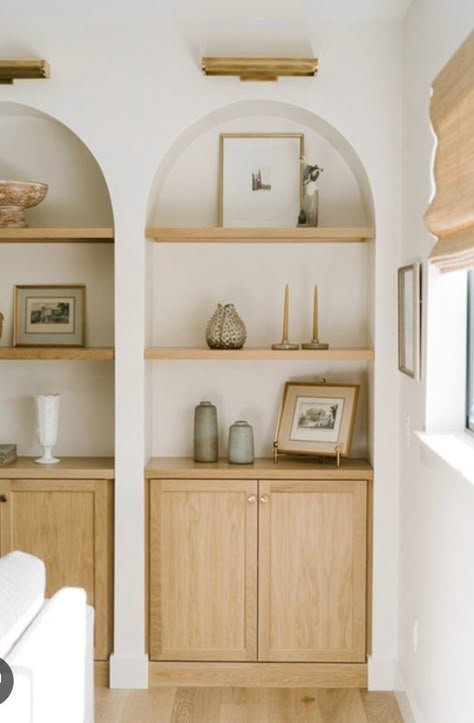
NEXT STEPS
Next on my to-do list is building the floating shelves—and then finally getting our living room back in order! In hindsight, tackling a living room renovation at the same time as the kitchen may not have been my most strategic decision. The house was definitely in full-blown chaos mode. BUT, having contractors already on-site ended up being a huge help. I was able to bounce ideas off them, get second opinions, and even ask for quick assessments on structural concerns. So... would I do it again? Honestly—absolutely. Chaos and all!
